I have been obsessed with quilts lately! Maybe it's the weather turning cooler or another technique to learn. When I picked up the latest issue of Stitch Magazine and saw the Alphabet quilt, I fell in love! And, it just so happens that my best friend is pregnant with her first child. What better reason to try it out! I've done a few lap quilts with no patch working and free motion quilting but this will be my first "real" quilt. This quilt is fairly easy in the large scheme of things, large blocks, squared edges. I think the biggest challenge is the time it takes. I'm used to starting and completing a project in two hours tops. This, however, will take some time. I don't know how it will turn out but I'd love for you to join me in this adventure!
Supplies for the Quilt Top:
I picked up 12 fat quarters and had a good sized remnant of the Mod Bird cotton pictured above. If you happen to have the Stitch Mag that features this quilt you will see that I did not follow the dimensions given. Their pattern is for a twin size quilt and I don't want this one to be that large. I cut my fat quarters into 8" squares (26 of them) and I cut the large feature block (the birds) 15.5" square.
You will also need about one yard of wonder under/heat n bond, any double sided fusible interfacing (to applique letters).
So, we have our squares cut! Now we need letters. I printed mine in Microsoft Word. I alternated between Tahoma and Arial fonts and chose random sizes between 250 and 700. I also alternated capital and lower case.
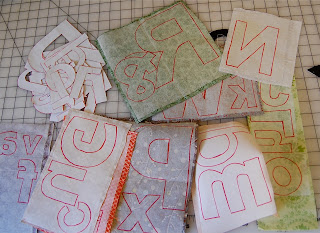
I cut out the paper letters to use as templates for the appliques. I used leftover fabric from the fat quarters as the letters. I picked fabric at random and ironed on the wonder under, paper side up!
The great thing about fusible interfacing is that you can trace directly onto the paper backing. Again, I randomly traced letters on to the various fabrics.
After tracing I alternated between regular scissors and pinking shears to cut out the letters. The pinking shears aren't necessary, I just wanted a few letters to have zig zag edges. Finally, the cutting is over!
Now we have to iron our letters onto the squares. I laid out all my squares (the floor usually works best for this) to make sure the different patterns were nicely arranged. The easiest way to peel the paper backing is to score it in the middle with scissors and peel from there.
Place your letter, right side up onto the right side of its designated square and give it a good hot steam to adhere. I placed the letters randomly on each square instead of centering each one.
Now line everything up, take a step back, and admire the (probably) fours hours worth of work you have already put into this sucker! Up next- stitching our appliques. But we'll save that for another day, I'm pooped!


Jess, that's beautiful!
ReplyDeletethanks courtney!
ReplyDelete